How to Draw Scooby-Doo. Scooby-Doo is one of the most popular and enduring cartoon characters ever created.
Also check our easy unicorn coloring page.
He first appeared as a puzzle solver in 1969 and is as popular today as ever, with countless movies, shows, video games, and toys based on him.
Despite this success, this design can make Scooby-Doo challenging to draw correctly.
Luckily, with this guide, you’ll discover just how easy it can be! It will help if you read to the end to see how it’s done.
How to Draw Scooby-Doo
Step 1
In this first step of our guide on how to draw Scooby-Doo, we’ll start with the face and nose. First, his nose is drawn with a rounded triangular shape.
Then you can use curved lines around his nose to create the outline of his muzzle.
As you can see in the reference image, there will be a split in the middle of the snout where it connects to the nose.
Step 2
Continue with your drawing of Scooby-Doo, adding the bottom of the mouth and the chin.
First, use a curved line under the muzzle for the lower lip. Then you can use another curved line underneath her chin.
Step 3
After you have drawn the nose, muzzle, and mouth, in this step of our how-to-draw Scooby-Doo guide, we will add the top of the head and the ears.
You can use some simple curved lines for the sides of his head and then draw his pointy ears.
The top of the ear on the right side falls slightly upwards.
Step 4
For this part of your Scooby-Doo drawing, draw the neck and collar. For his neck, you can draw two reasonably straight lines from his head.
Then you can draw a thin, rounded rectangular shape for his collar, as shown in the reference image.
Step 5
For now, we’ll leave Scooby’s head while you draw a chest for him in this step of our How to Draw Scooby-Doo guide.
To draw his chest, use two curved lines that mirror each other under his head. The reference image shows you how far down these bust lines should be.
Step 6
In this step of your Scooby-Doo drawing, you will add his front paws.
You can start by drawing curved lines for his shoulders and then give him slender legs that end in curved shapes for his toes.
Step 7
Scooby is sitting in this picture, so we’ll draw his back legs to reflect that in this step of our how-to-draw Scooby-Doo guide.
His hips and the tips of his hind legs are drawn with curved lines. Then their feet are drawn using a combination of straight lines and curves for the toes.
Follow our reference image to help you!
Step 8
This part of your Scooby-Doo drawing should be easy to do! All you have to do is pull his tail, which comes out of the side of his right hind leg.
As shown in our provided image, you can draw it with a curved line. It’s that simple, and you’re ready for the finishing touches!
Step 9
Before we add colors in the final step of this How to Draw Scooby-Doo guide, we need to add a few final details and finishing touches! First, you can draw her little eyes with simple ovals.
Then you can add more minor details like the inside of the ears and the SD logo on the collar. Finally, you can add some points behind her back.
Before proceeding, feel free to add some extra details as well! You could draw other Scooby-Doo characters or design a wallpaper to recreate your favorite Scooby-Doo moment!
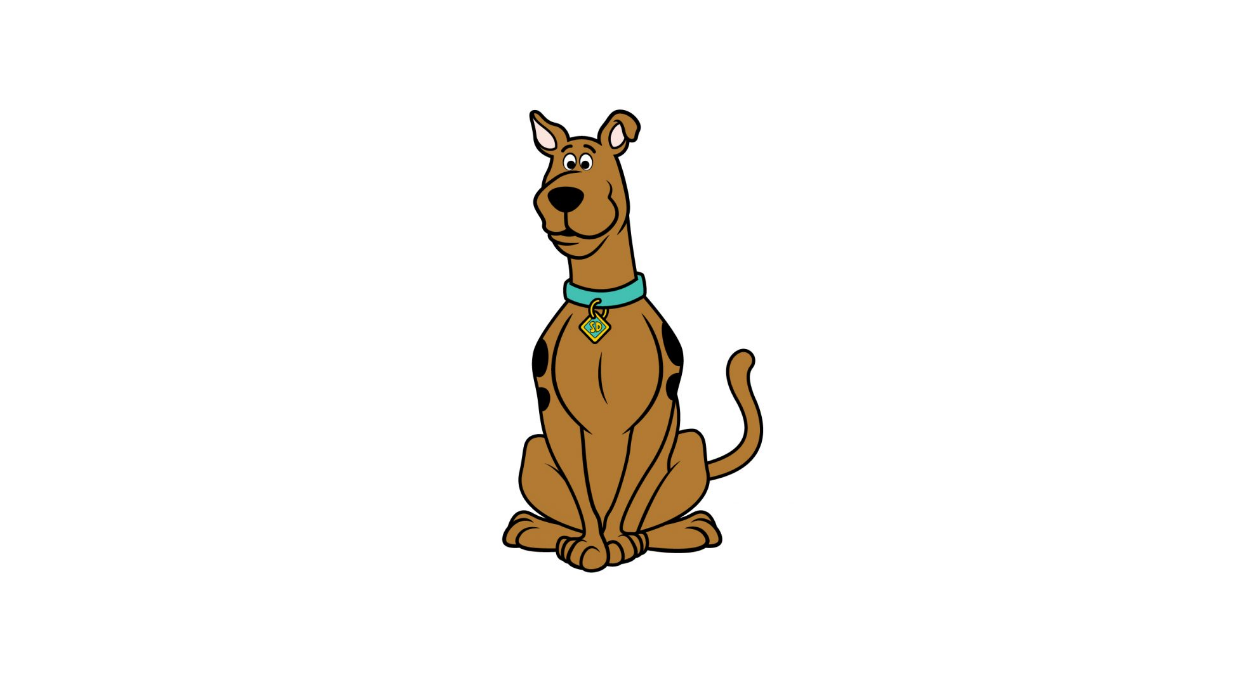
Settle in for the final part of your Scooby-Doo drawing by coloring it in! In our reference image, we used his signature brown coloring for the body with blue and yellow for the collar.
This gives you a good guide if you want to keep the classic color scheme!
Make sure to color in any additional elements or background details you may have added!
You can also experiment with different artistic tools and mediums to bring this design to life.
Your Scooby-Doo Drawing is Finished!


